Composting is an age-old practice that has gained renewed attention in recent years as people become more environmentally conscious and look for sustainable ways to manage waste. At its core, composting is the process of converting organic waste like food scraps, yard clippings, and paper products into a rich, soil-like substance known as compost. This compost is often referred to as “black gold” due to its valuable role in enhancing soil quality and promoting plant growth.
Basically, composting is a natural process of decomposition. Organic materials break down into nutrient-rich substances through the action of microorganisms, such as bacteria and fungi, as well as macro-organisms like earthworms and insects. These organisms break down the material, transforming it into humus, which is an essential component of healthy soil.
Benefits of Composting
1. Reduces Waste: Composting diverts a significant portion of household waste from landfills. Approximately 30% of what we throw away can be composted, reducing the burden on waste management systems.
2. Improves Soil Health: Compost enriches the soil, helping it retain moisture and suppress plant diseases and pests. It also encourages the production of beneficial bacteria and fungi that break down organic matter to create humus, which increases the nutrient content in soils.
3. Reduces Greenhouse Gases: When organic waste is sent to landfills, it decomposes anaerobically (without oxygen), producing methane which is a potent greenhouse gas. Composting allows for aerobic decomposition, which significantly reduces methane emissions.
4. Saves Money: By reducing the need for chemical fertilizers and pesticides, composting can save money for gardeners and farmers. It also reduces the need for water by improving soil structure and water retention.
How to Compost
Starting a compost pile or bin at home is relatively simple and requires just a few basic components:
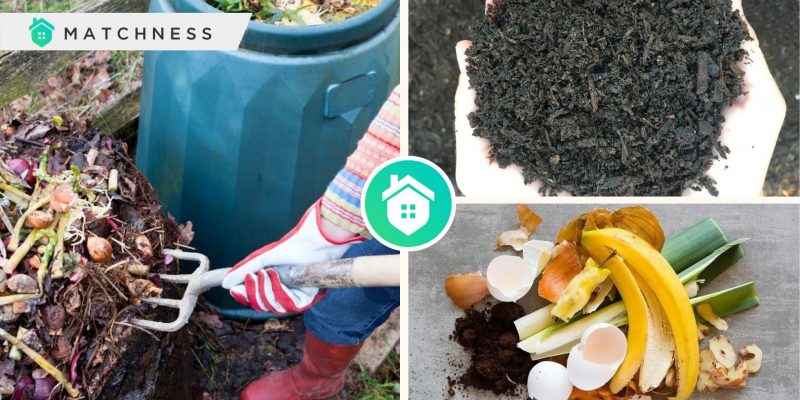
1. Organic Waste: This includes “greens” (nitrogen-rich materials like fruit and vegetable scraps, coffee grounds, and grass clippings) and “browns” (carbon-rich materials like dry leaves, cardboard, and paper).
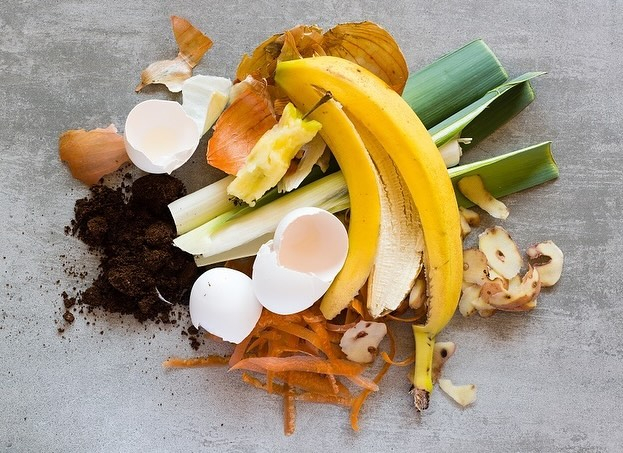
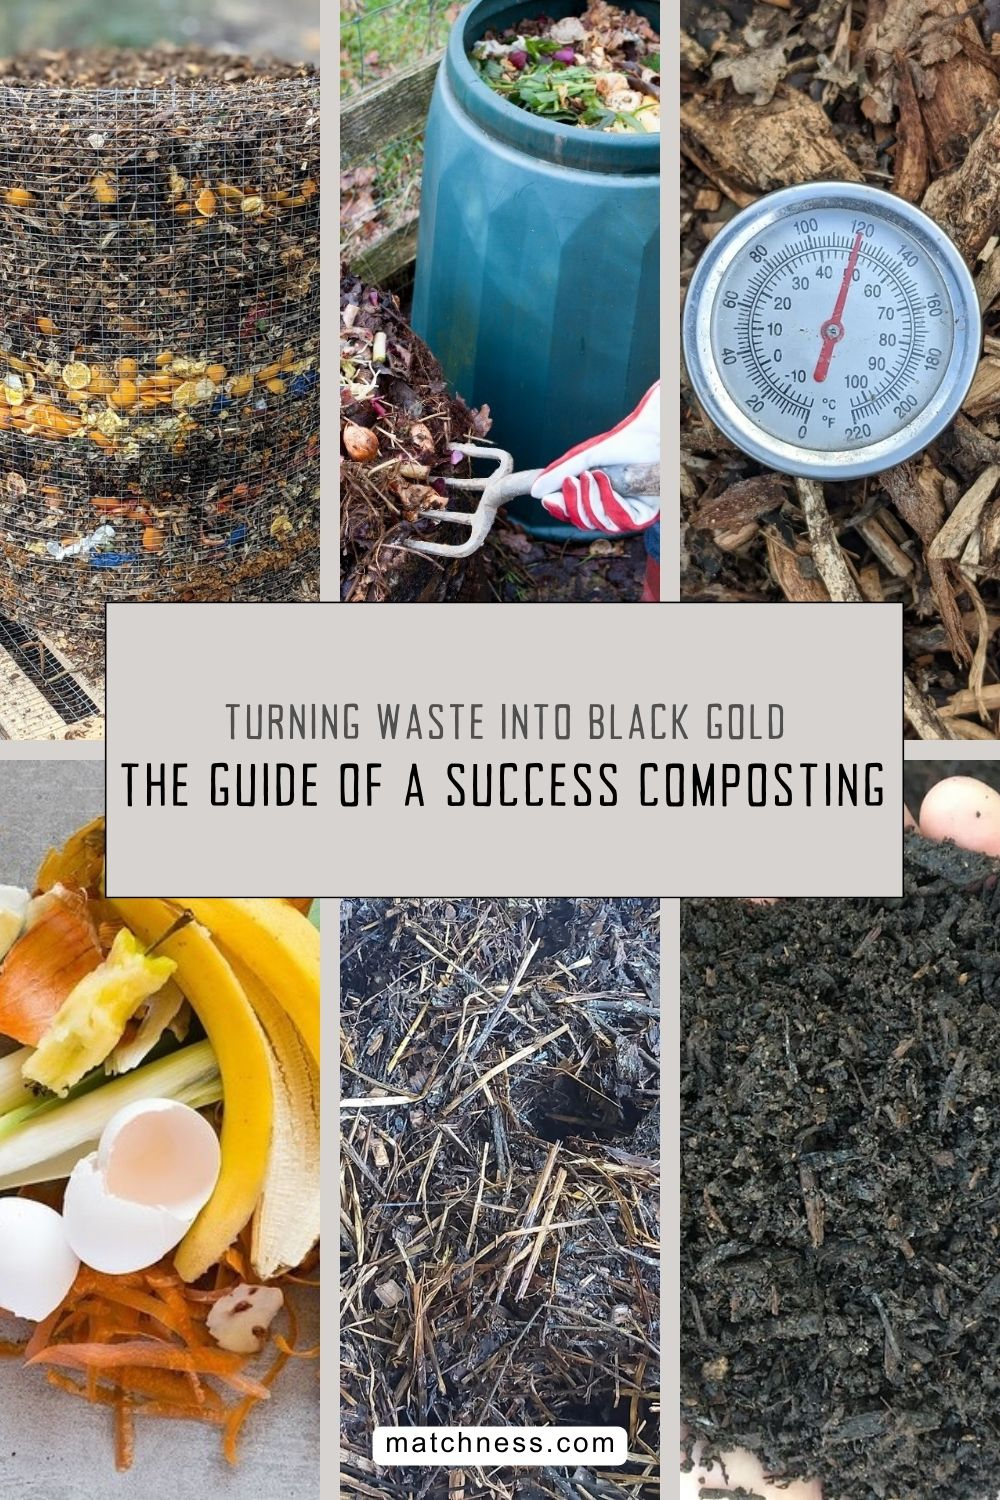
The organic waste here consists of eggshells, coffee, fruit scraps, and vegetable scraps. It is really easy to compile all of those materials since the organic waste here is the everyday waste you have. Organic Waste from @pa.eats
2. Moisture: Composting materials need to be moist, but not soggy. Water helps to break down the organic matter and is essential for the microorganisms that facilitate decomposition.
3. Aeration: Oxygen is crucial for aerobic decomposition. Turning the compost pile regularly helps to aerate it and speeds up the composting process.
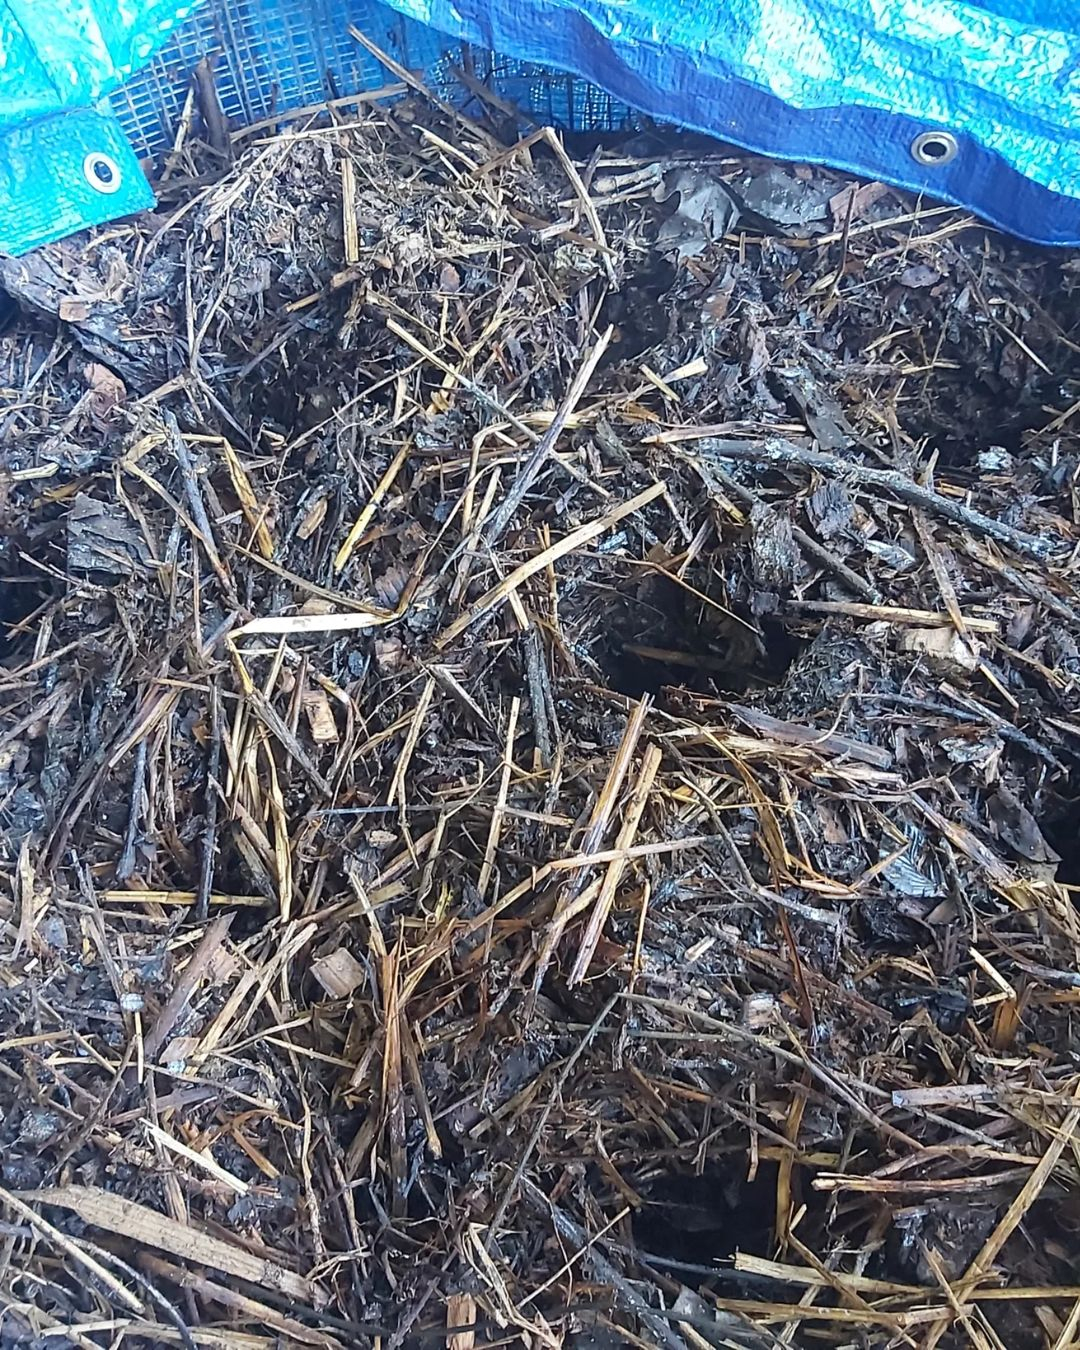
The aeration is an easy process since you just have to create holes like this. You can use any tools to create the holes just based on the condition of the surface you want to add with holes. Aeration from @rootshoot_soils
4. Microorganisms: These can be naturally occurring in the materials you add to your compost, but adding a bit of finished compost or garden soil can introduce beneficial microorganisms to help kickstart the process.
Steps to Start Composting
1. Choose a Location: Select a dry, shady spot near a water source for your compost pile or bin.
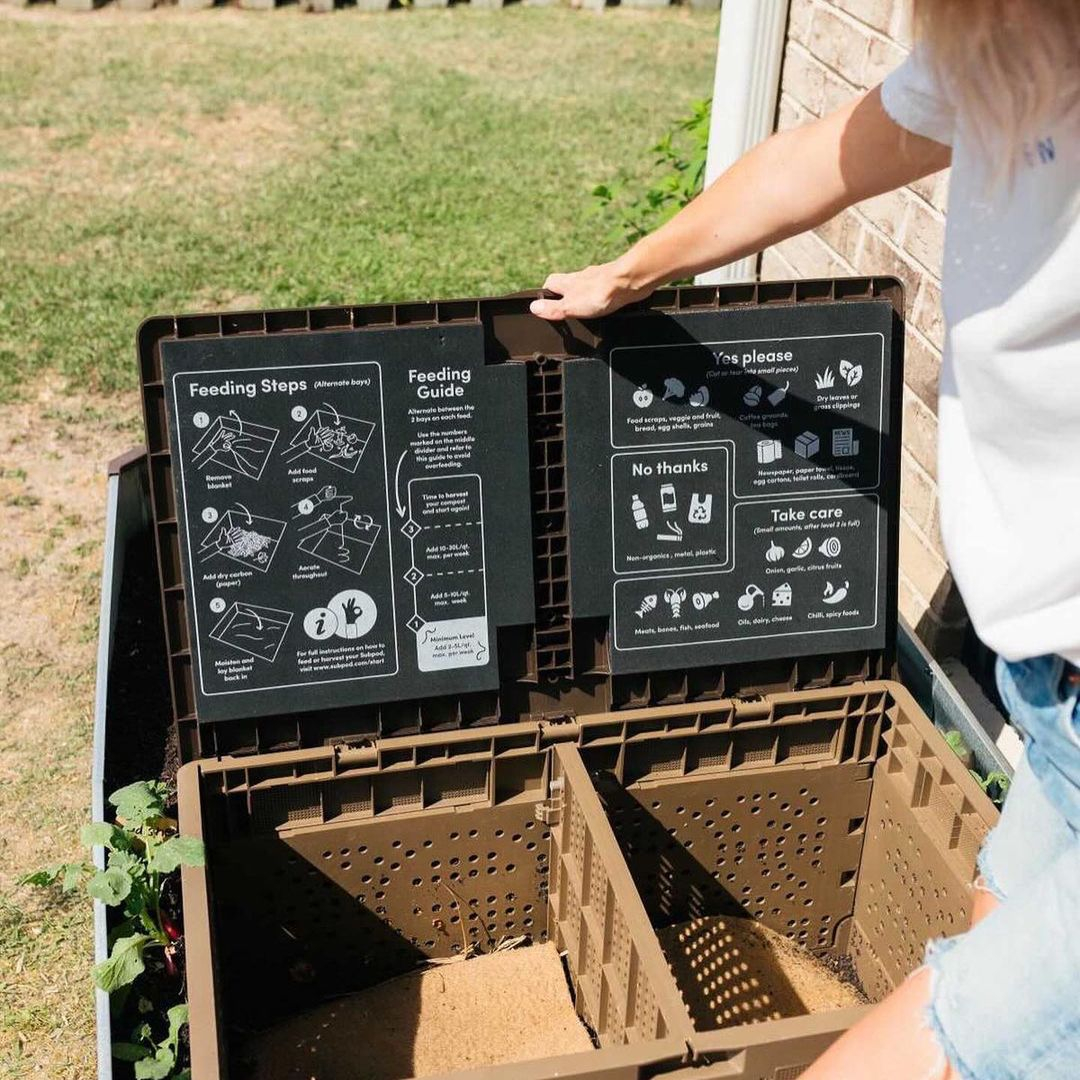
After choosing the right spot, here is an example of the composting bin that you can choose. It has directions about how to make the compost so that you can do the composting easily. Composting Bin from @littlesouthernwife
2. Add Materials: Start with a layer of browns, then add greens. Keep adding these layers, ensuring you maintain a balance. Ideally, the ratio of browns to greens should be about 3:1.
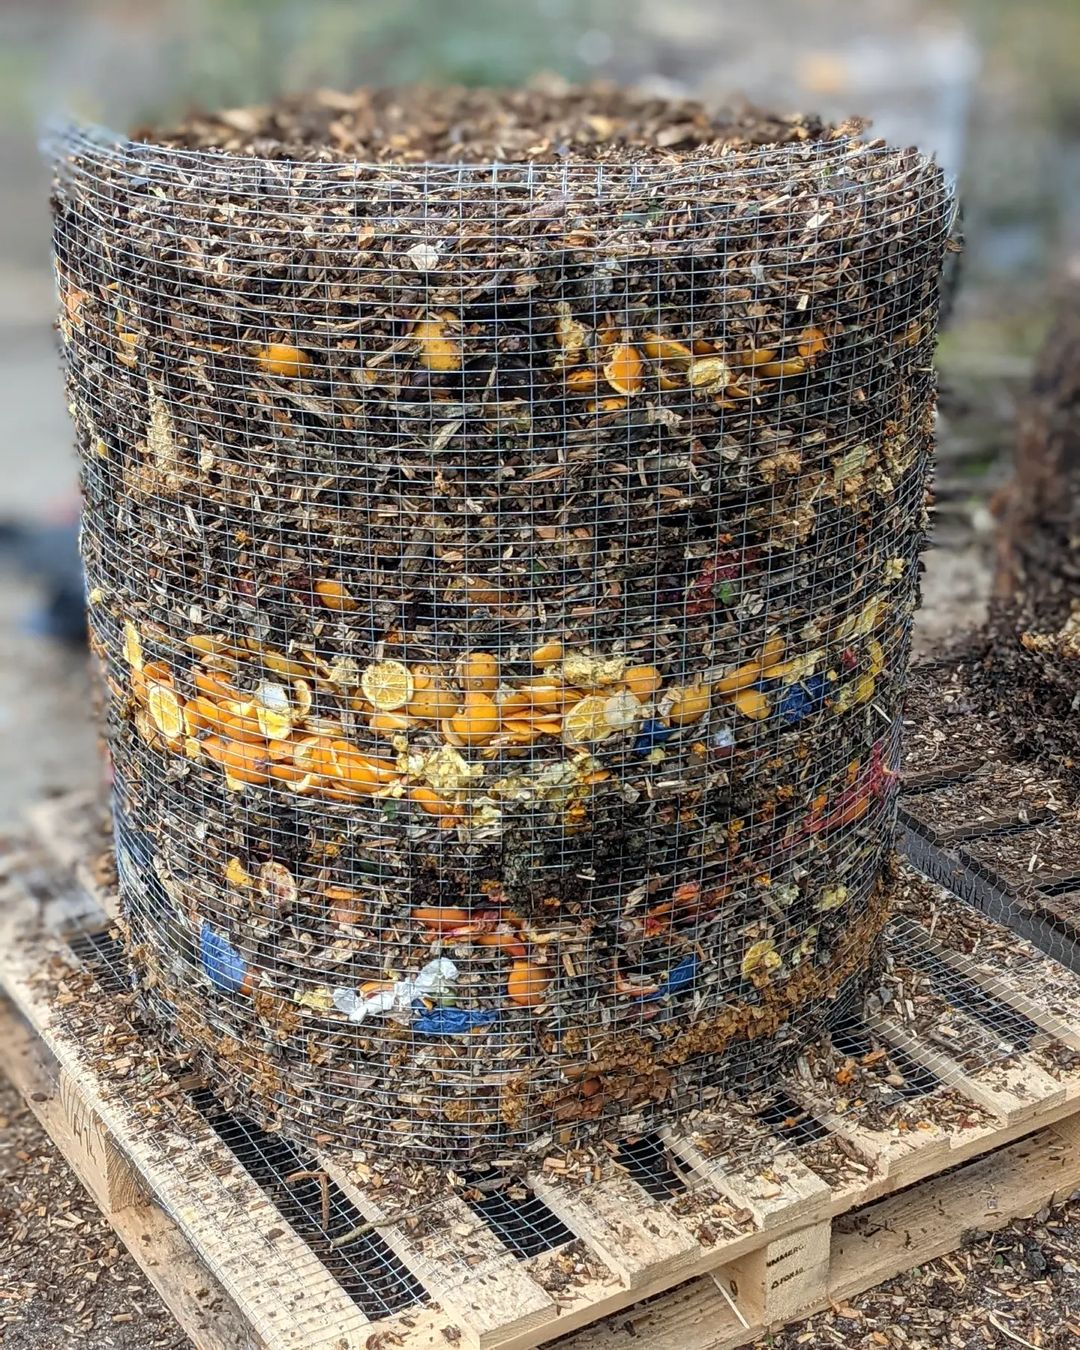
You can see the layer that this bin has to create such a great compost. It comes in a wire net so that you can see the layer that this composting process does. Composting Materials from @compost_club
3. Moisten: Water the pile or bin as needed to keep it moist but not waterlogged.
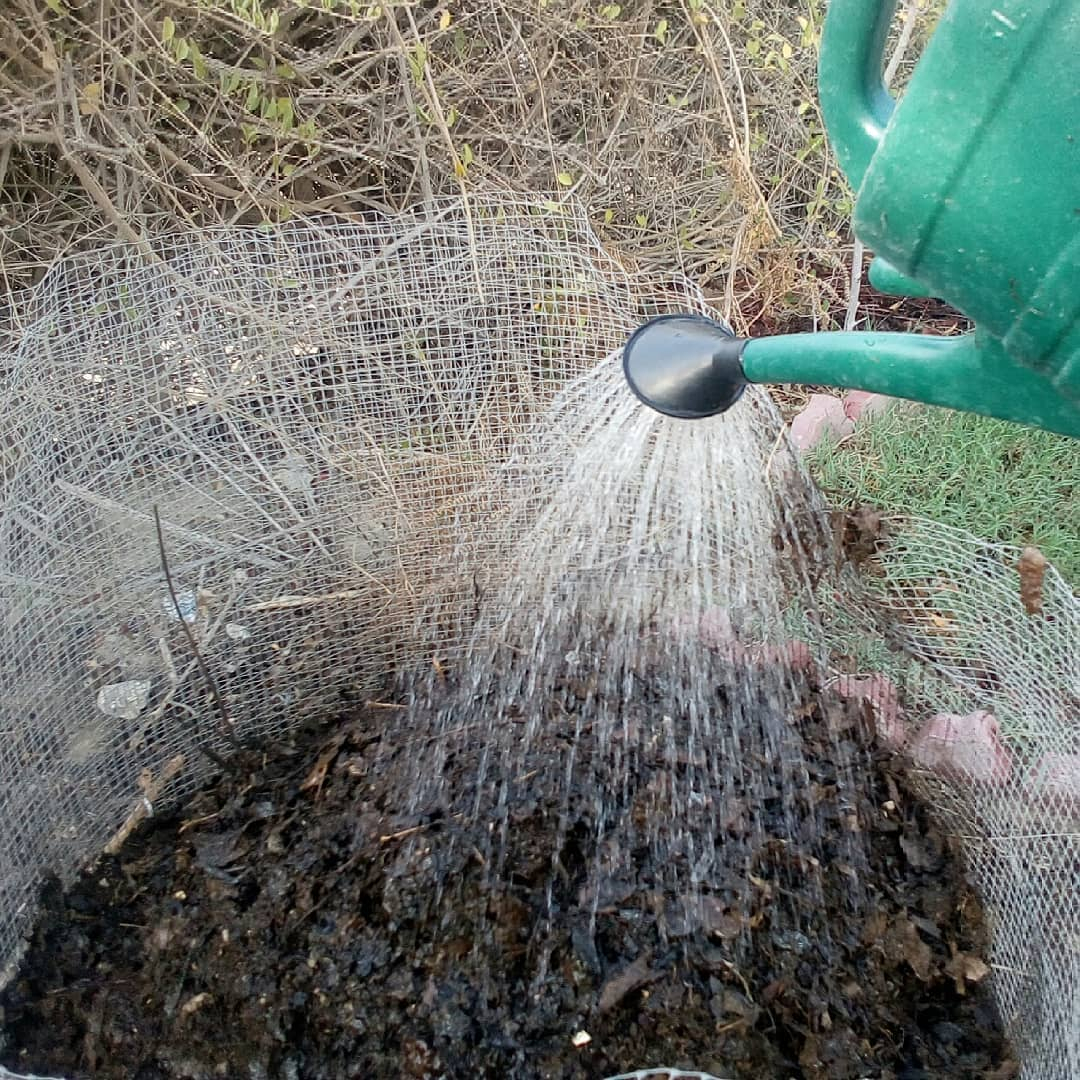
You can moisten the compost by simply watering it by using the water can. It’s like the can that you commonly use to water your plants. So simple but should be careful not to make it too much watered. Compost Moisten from @grow_food_for_free
4. Turn: Every few weeks, use a garden fork or shovel to turn the compost, ensuring it stays aerated.
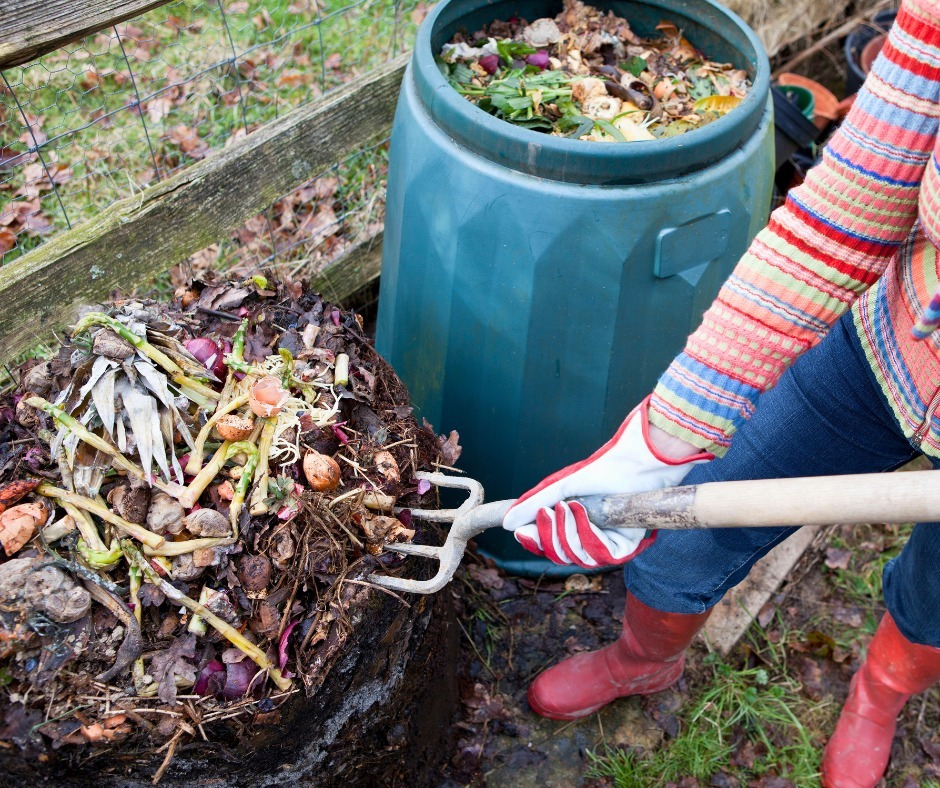
You can see it here where the garden fork is used to turn the compost. This one is the most effective tool related to the compost texture and weight. Turn the Compost from @hsvgarden
5. Monitor: Over time, the compost will heat up and start to break down. Monitor the temperature and moisture levels to ensure the process is proceeding smoothly.
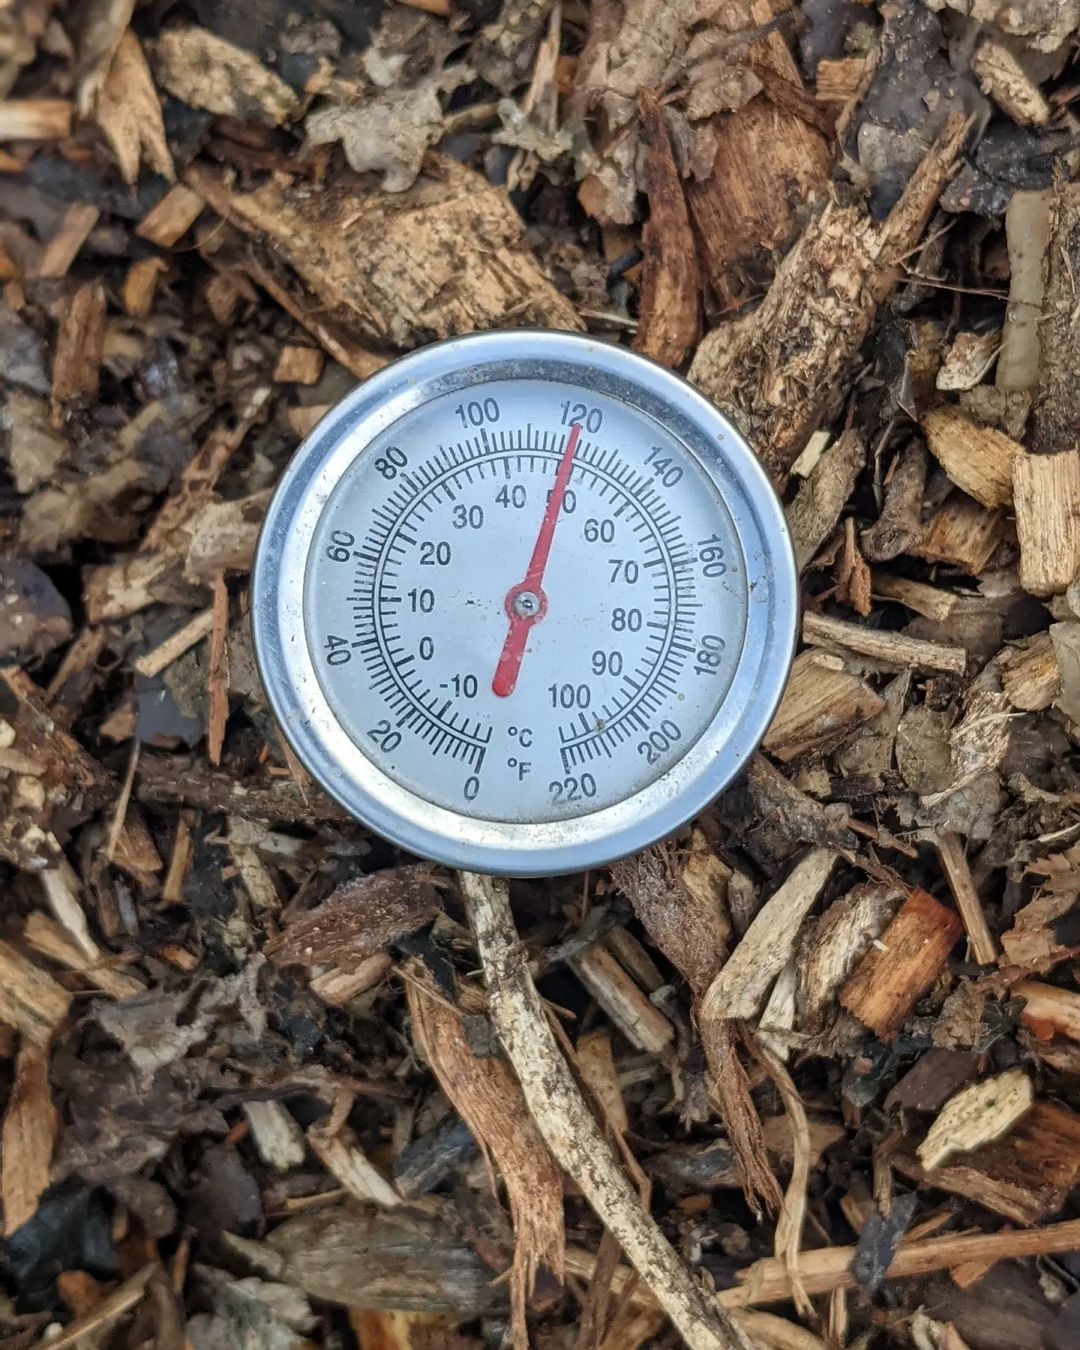
You can simply use the thermometer to monitor your compost temperature. It is like the thermometer that you use for the succulents and other garden needs. Compost Temperature from @compost_club
6. Harvest: After several months to a year, the compost should be ready. It will be dark, crumbly, and have an earthy smell. Use it in your garden to enrich the soil.
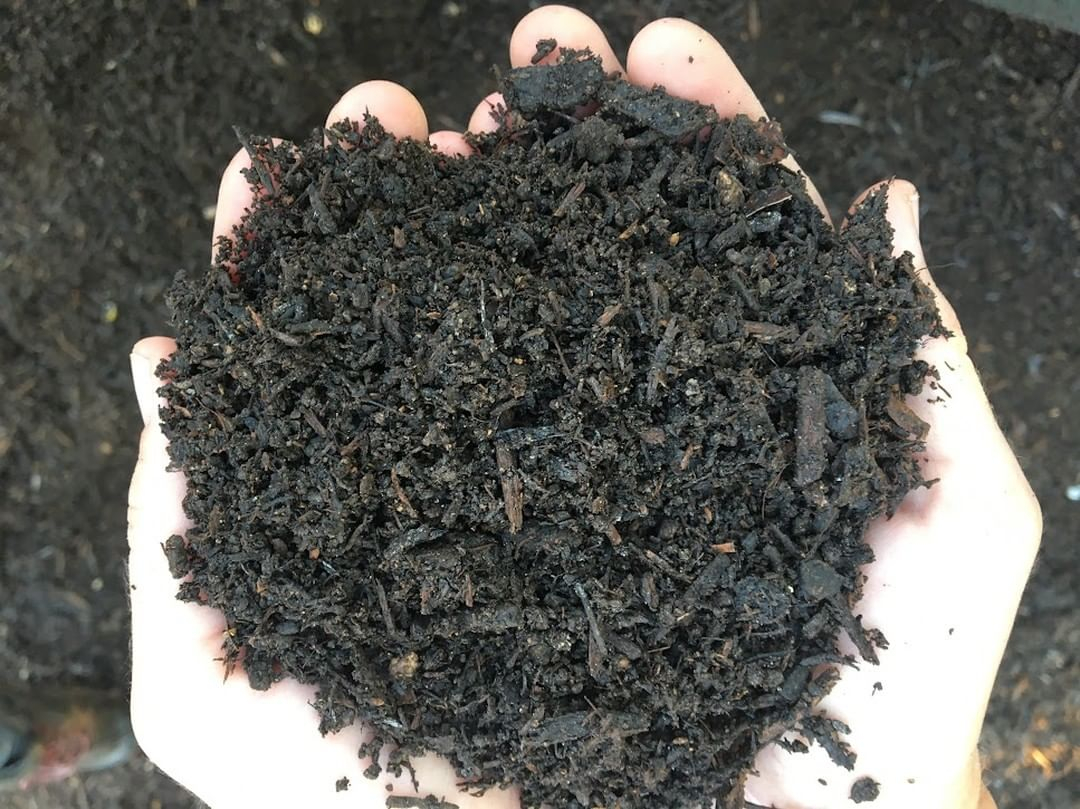
Here is the look of the finished compost. It is in black color as it is mentioned as the black gold. Harvesting the Compost from @compostqueens