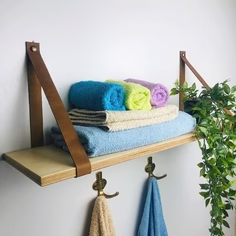
Making crafts is a sign of creativity. It not only boosts your creativity level but also makes you busy in your leisure time. If you constantly misplace your key, you need a Key Holder. A Key Holder is normally placed in the front of the drawing-room. It gives you the facilities of placing your keys always in a fixed place. You need not remember where you have been placed last time.
You can make distinct types of Key Holder by yourself. Like Plastic Key Holder, Rubber Key Holder, Metal Key Holder, Wood Key Holder, etc. However, a Magnetic Key Holder is different and unique from those. In this passage, I will guide you on How do you make a Magnetic Key Holder at home.
What is a magnetic key holder?
A Magnetic Key Holder comes with a magnet instead of a hook. It ensures the key misplacing issues. The magnet of the key holder tempts your keys and you just require to place your keys close to the Holder. It is more classical than any normal Key Holder. In a Magnetic Key Holder, you can put five to six keys at a time. You can extend the space if you want while making a Key Holder.
The best part of a Magnet Keyholder is that you can place it wherever you want. The Durability of a handmade Magnetic Key Holder is much better than a readymade Key Holder. You can give the shape of the Key Holder as you want. You can design it with your heart to enhance the beauty.
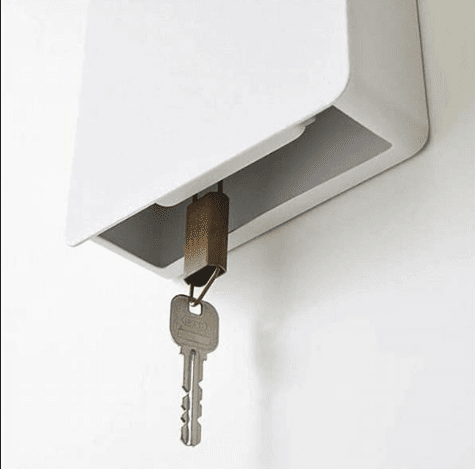
Besides, If you are lazy enough to make a handmade Key Holder, you can purchase one. XY Find a Key Holder that has been designed with all advanced technology. I will discuss this product in the last part of my article. Keep Patience.
How do you make a magnetic key holder?
I am intending to help you to solve the misplacement of your keys. As I said earlier, the Magnetic Key Holder can be formed with distinct types of material. Now in this section, I will show you, How do you make a Magnetic Key Holder, so keep reading the article.
The things you should collect to complete the project is-
- Any wood of your choice
- Rare Earth Magnets
- Keyhole hangers
- Boiled Linseed Oil
- Sanding sticks
The process of making a DIY Magnetic Key Holder
- Give the Shape on Wood
- Place the Magnet on the Wood
- Finish the Key Holder and Mount it.
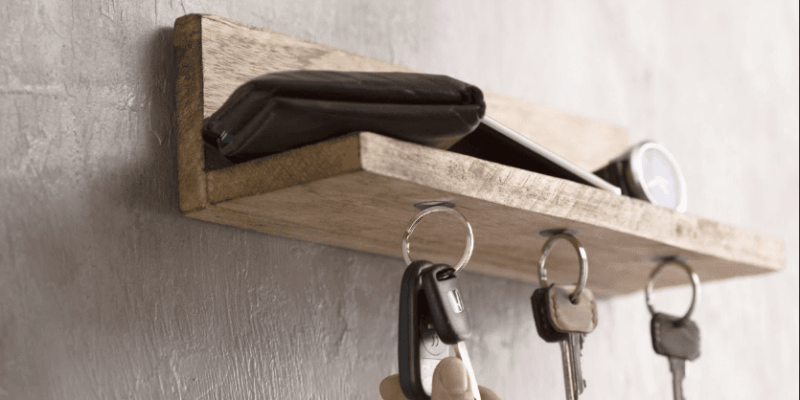
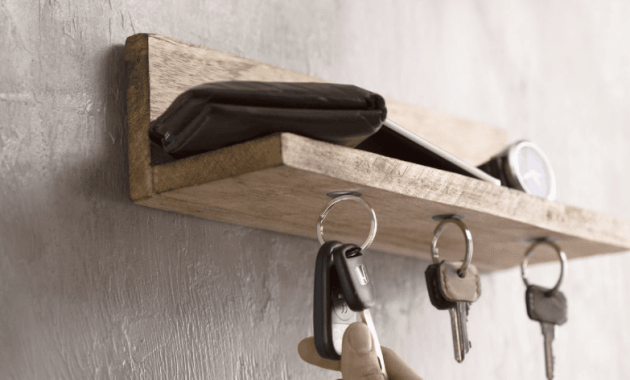
1.Give the Shape on Wood
To make a magnetic Key Holder, you need a good piece of hardwood. The thickness of wood should be 1 to 2 inches. Firstly you need to draw the shape on a
paper template. Then with a spray, you need to stick the template on the wood. Just use a light coat of spray on the paper.
So that it won’t get stuck too hard with the wood. Then you need to cut off the wood according to your desired shape. Use a bandsaw to cut the shape. Take your time and be careful while shaping. While shaping, it may leave some rough edges, but you can sand it out later.
After cutting the wood, take the template out. Now sand the edges of the wood to give it a polished look. You can use filers and sanding sticks to do this.
2. Place the Magnet on the Wood
The main thing of a Magnetic Key Holder is the Magnet itself. You need three rare earth magnets of good quality. The magnets you choose should be able to hold heavy items. Choose a durable magnet that has durability enough that it can strongly mount or screw-on walls.
Now put the magnets on the wood’s backside and mark the holes. To drill the holes for placing the magnets set the drill machine’s depth stop first. It will ensure accurate drilling of the wood and prevent drilling the keyholder’s front side. You can mark the depth using blue tape if using a hand drill.
You have to drill as deep as possible without going through the board. Set the magnet’s bottom into the key holder’s lower edge by 3/16”. It will make the keys hanging off the bottom of the keyring. To drill the holes for the magnets, you can use a 1-¼” Forstner bit. Be sure you are drilling on the backside of the wood.
The magnet’s diameter is 1.26”; ensure sand the edges before mounting the magnets. After that, place the rare earth magnets with a punch and mallet into the holes. When assembling, make sure the magnet’s rounded cups are facing out the back.
3. Finish the wood and Mount Hardware
I used boiled linseed oil on the wood to give it a finished look. Simply wipe 2 coats on the wood and wipe off the excess. Let the wood dry overnight. To mount the keyholder using keyhole hangers will be the best option.
Put the hangers on the behind of the keyholder and mount them between the magnets. When attaching, do not drill through the keyholder’s front face. Now, it’s time for hanging the magnetic keyholder somewhere in your home.
Final Word
Remembering every day where you keep the keys is the most annoying thing for everyone. Here we provide how to deal with this matter and evade worsening your time. A keyholder can help you to solve this issue. If you are a DIY person, it won’t be that tough for you to create your own key holder.
You can create a Magnetic Key Holder with different materials like wood, metal, plastic, cement. From this guide, you can learn How do you make a magnetic key holder. It’s a super easy and cost-effective woodworking project. So, without further ado, start creating your own keyholder with the help of this useful guide.
Resource:
https://nerdknowbetter.com/best-magnetic-key-holder
https://removeandreplace.com/2014/04/15/how-to-make-a-diy-wall-mounted-magnetic-key-holder/