Even if you’re in love with your home, there’s nothing worse than cleaning off your car first thing in the morning. Whether debris from nearby plants, a few run-ins with wildlife, or simply snow and ice, nobody wants to spend ten minutes cleaning their windows to start the day.
Luckily, carports are an accessible and affordable option for those looking to protect their cars from the elements. If you’re looking to shop around for carports, then click here to see some of the best options on the market. Once you’ve identified the carport that will suit your needs, you may or may not have the assistance of an assembly crew.
If you’re handling the construction yourself, then dive in with these seven steps.
Step 1: Envision the Perfect Setup
Before you dive in to setting up your carport, spend time figuring out exactly where you want to set it up. For many, this decision will come down to space. But if you’re not short on space, then keep in mind that your carport could serve as an outdoor meeting area when the weather permits. In other words, plan for multifunctionality from the start.
Step 2: Get the Stamp of Approval
You may need to clear your carport with your local authorities, whether a Home Owners’ Association or a construction permit. The latter likely refers to electricity hookups for those looking to add a few extra features to their carport. Additionally, you will likely need to declare the carport as an asset, which will boost the value of your home.
Step 3: Double-Check Your Measurements
Now that you’ve planned carefully and had your carport signed off on, you double-check your setup. Before your start hammering and sawing, make sure that you’ve double-checked your measurements. A little extra work here goes a long way in preventing mishaps down the line.
Step 4: Prepare the Ground
One of those measurements that you should have double-checked is whether the ground is flat. If it is, then you’re ready to prepare the ground for building. First, remove the grass and then cover it with gravel or dark weed matting. Here, you’ll also need to plan out where your electrical lines will run.
Step 5: Prepare to Raise the Posts
Now you’re ready to dig the holes in order to raise the posts. If you’re not working with an assembly crew, then you’ll need to bribe a few friends to help you raise the posts. Once they’re set into the ground, pour in concrete to set them into place.
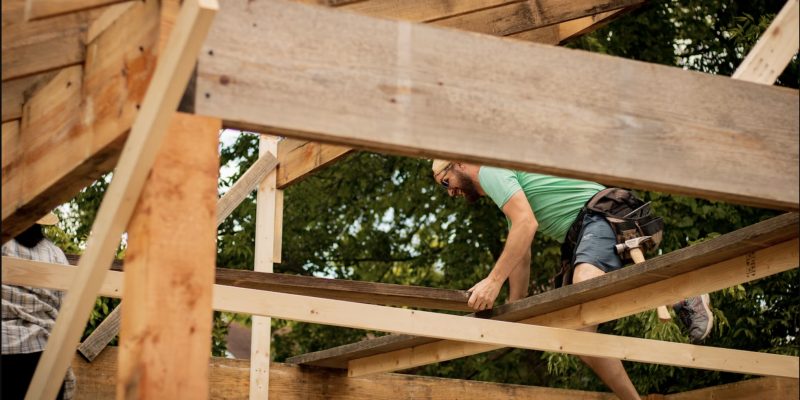
Step 6: Set Up Beams & Rafters
Assuming you’ve given that concrete plenty of time to dry, then you’re ready to set up the beams and rafters. One of the most important considerations at this point in time is rainfall. If you live in an area that sees inches of rain during the day, then you may want to keep one portion of the carport raised to direct runoff rain to one side (ideally, away from your home’s foundation).
Step 7: Finish With the Gutters & Rooftop
Here comes the easy part, as the gutters and rooftop should set right into place—so long as your measurements are correct. Once again, be mindful of where your gutters are draining if you live in an area with lots of rainfall.