TV mounting refers to the process of securely attaching a television to a wall or ceiling using a specially designed bracket. This technique is widely popular due to its numerous advantages. Firstly, TV mounting saves space, making it ideal for small homes or apartments where floor space is at a premium. Secondly, it provides a more immersive viewing experience, as the TV can be placed at an optimal height and angle for viewing comfort. Lastly, it adds an element of safety by keeping the TV out of reach from children and pets, and preventing it from being knocked over. Therefore, considering TV mounting is crucial when purchasing a new TV.
Choosing a Good TV Mounting Service Like NYC TV Mounting
When it comes to selecting a TV mounting service like NYC TV Mounting, there are several factors to consider in order to ensure a professional, secure, and visually appealing setup. The quality and reliability of the service provided will significantly impact your viewing experience and the overall aesthetic of your home.
- Experience and Expertise: The service provider should have extensive experience in installing various types of mounts and TVs of different sizes and brands. An experienced technician will handle your equipment with care, preventing any accidental damage during the installation.
- Reputation: Look for a service with positive reviews and ratings. Customer testimonials can provide valuable insights into the quality of service and customer satisfaction.
- Pricing: The pricing should be transparent, and there shouldn’t be any hidden charges. Look for a service that offers value for money, balancing cost with quality service.
- Services Offered: Apart from TV mounting, the NYC TV Mounting should also offer additional services such as cable management, soundbar installation, and troubleshooting to ensure a complete setup.
- Installation Equipment: The service should use high-quality, sturdy mounting hardware to ensure a secure and durable installation. They should also have the necessary tools and equipment for a professional setup.
- Consultation and Site Inspection: A reputable service provider will offer a consultation and site inspection before the installation to discuss your specific needs and ensure that the mounting location is suitable.
- Customer Service: The service provider should be responsive and ready to address any concerns or queries you may have. Good customer service often indicates a company’s commitment to customer satisfaction.
- Warranty or Guarantee: Choose a service that offers a warranty or guarantee on their work. This provides you with peace of mind, knowing that you can call them back if any issues arise after the installation.
- Clean-Up and Aesthetics: NYC TV Mounting service will ensure that the installation area is left clean and tidy, with all cables neatly organized and hidden for a visually appealing setup.
- Safety Standards: The service provider should follow safety protocols to prevent any accidents during the installation process. They should also adhere to electrical codes and regulations when handling wires and cables.
Careful consideration of these factors will help you choose a TV mounting service that aligns with your needs and expectations. Investing time in research and comparison will ensure a seamless viewing experience, enhancing your entertainment setup.
NYC TV Mounting Process
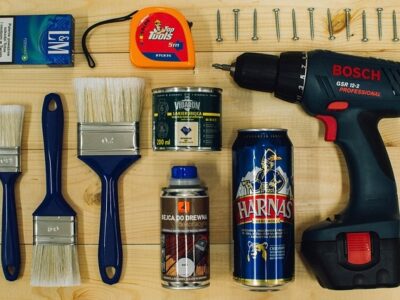
Before you begin the process of TV mounting, ensure that you have all the necessary tools and materials at hand. Here’s a list of what you’ll need:
- TV Mount: Choose a TV mount that’s compatible with your TV’s size and weight. There are different types of mounts available in the market, such as fixed mounts, tilting mounts, and full-motion mounts, each offering different viewing flexibility.
- Stud Finder: This tool is essential for locating the studs in the wall where you’ll secure the mount. Attaching the mount directly to the stud ensures a solid and secure installation.
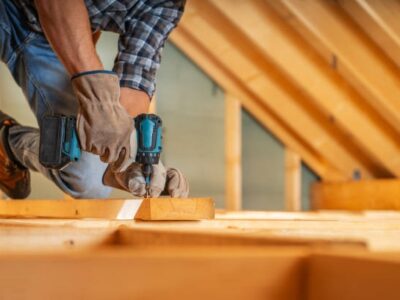
- Drill and Drill Bits: A power drill and the appropriate drill bits are necessary for making holes in the wall for the mounting hardware.
- Screwdriver or Power Driver: You’ll need a screwdriver or power driver to secure the bolts and screws of the mount.
- Level: A level is used to ensure that the mount and the TV are perfectly horizontal.
- Tape Measure: Measure the distance between the mounting holes and the intended viewing area to ensure proper placement.
- Cable Concealers: Cable concealers or cable management system will help keep your cables organized and out of view for a clean and tidy appearance.
- HDMI Cables and Power Cords: Ensure that you have all necessary cables and power cords for your TV and other devices like soundbar or game console. Extra-long cables may be needed if the power source is far from the mounting location.
Remember, the process of mounting a TV requires precision and patience. Having all the necessary tools and materials ready can make the process go smoother and faster. If you’re unsure about any step of the process, it’s always best to seek professional help.
Step by Step Guide
- Choose the Location: Start by choosing the desired location for your TV. Consider factors such as viewing angle, lighting, and accessibility when deciding on a spot.
- Find Studs and Mark Mounting Holes: Use a stud finder to locate the studs in the wall. Mark the mounting holes with a pencil, ensuring that they are level and evenly spaced.
- Drill Pilot Holes: Using a drill and appropriate drill bit, create pilot holes at the marked locations on the wall.
- Attach Mounting Bracket: Securely attach the mounting bracket to the wall using screws or bolts. Ensure that it is level and properly aligned with the pilot holes.
- Install Wall Plate: Attach the wall plate to the back of your TV using screws or bolts provided in the mounting kit.
- Mount TV on Bracket: Carefully lift and mount the TV onto the bracket, ensuring that it locks securely into place.
- Connect Cables: Connect all necessary cables between your TV, devices, and power source.
- Cable Management: Use cable concealers or a cable management system to hide and organize cables for a clean setup.
- Test and Adjust: Turn on your TV and test its functionality. Make any necessary adjustments to achieve the desired viewing angle.
- Clean Up: Once everything is in place, take some time to tidy up the area and clean up any debris or dust.