Toasters are indispensable kitchen appliances, faithfully serving up crispy slices of toast day after day. However, as with any kitchen gadget, regular cleaning is essential to maintain its performance and longevity. In this comprehensive guide, we’ll delve into the importance of cleaning your toaster and provide step-by-step instructions, along with valuable tips and tricks, to ensure your appliance stays in top condition.
Anyway, before you start, you should know that cleaning the toaster not only looks better but also functions more efficiently. Over time, crumbs, grease, and debris accumulate inside the toaster, leading to uneven toasting and even potential fire hazards. Additionally, neglected crumbs can attract pests like ants and cockroaches, posing health risks. By incorporating regular cleaning into your kitchen routine, you can prolong the lifespan of your toaster and ensure a safe, delicious toast every time. Here we have some tips and tricks for your toaster maintenance.
- Regular Maintenance: Make toaster cleaning a part of your weekly kitchen routine to prevent crumbs and debris from building up.
- Use a Crumb Catcher: Consider using a toaster with a built-in crumb catcher or place a removable silicone liner at the bottom to simplify cleaning.
- Avoid Harsh Cleaners: Stick to mild cleaners and avoid abrasive materials that could scratch the toaster’s surface.
- Stay Clear of Water: Never submerge the toaster in water or pour water directly into the slots, as this can damage the appliance and pose a safety risk.
Now, let’s move to the guides in cleaning your toaster properly.
Safety First
Before starting any cleaning process, unplug the toaster from the power source and allow it to cool completely. Safety should always be the top priority when dealing with electrical appliances.

The toaster should be unplugged and keep plug dry to lower the risk. Toaster Unplug from @bailey_rachelle
Remove Crumbs
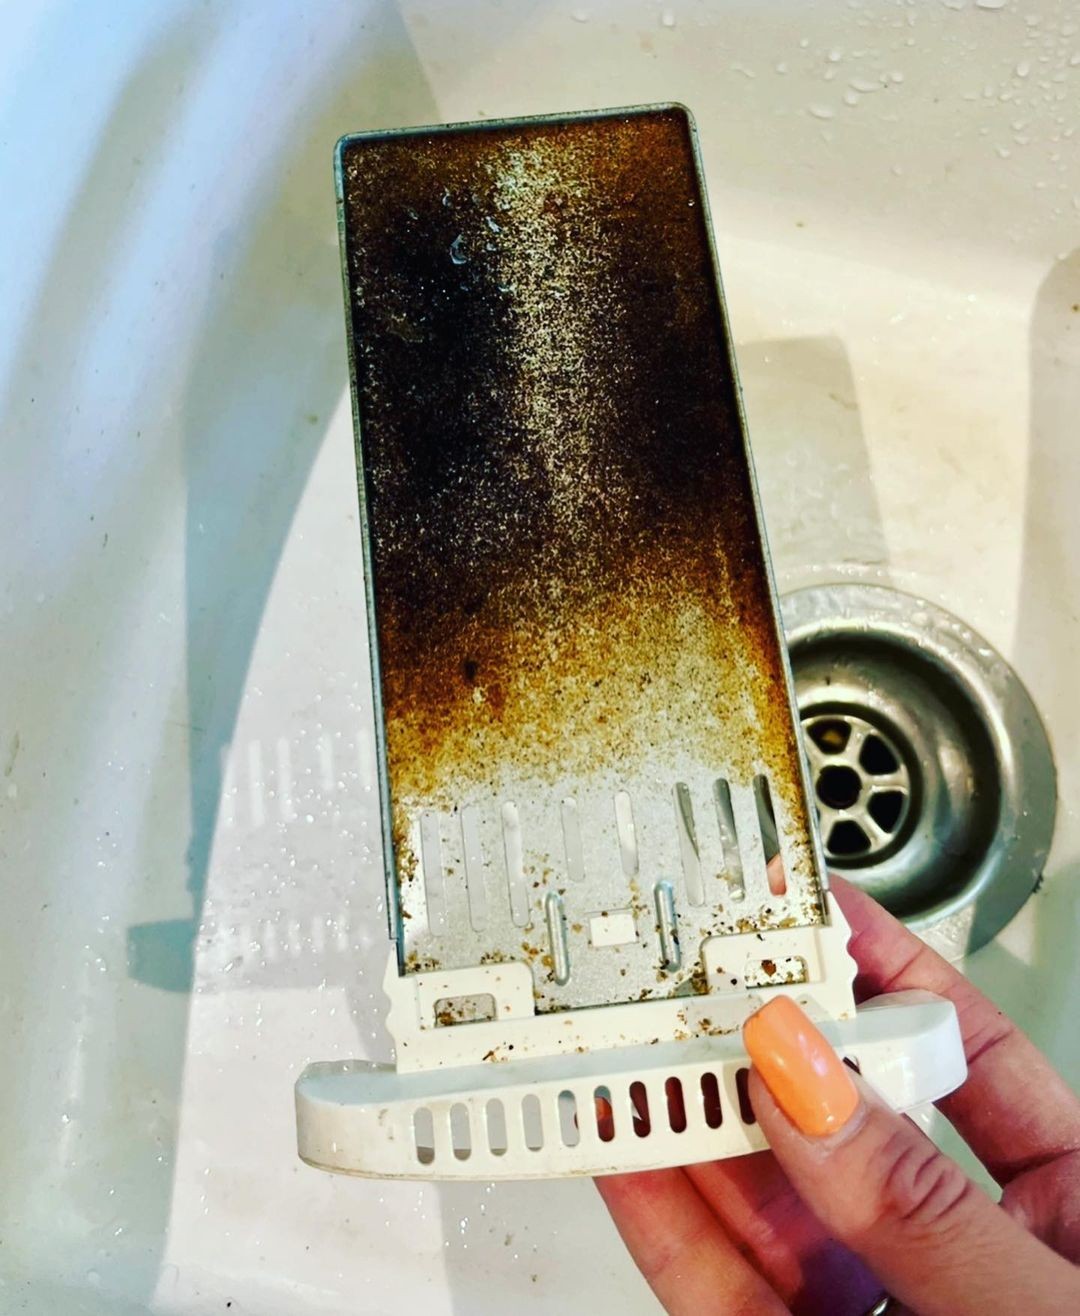
Most toasters are equipped with a removable crumb tray located at the bottom. Slide out the crumb tray and dispose of any accumulated crumbs. For stubborn crumbs stuck in the toaster slots, gently shake the appliance upside down over a trash bin or use a soft brush to dislodge them.

This one is what we call the crumb tray. You can see the crumbs there caused by the daily usage that should be cleaned. Removing Crumb Tray from @hlg_cleaning
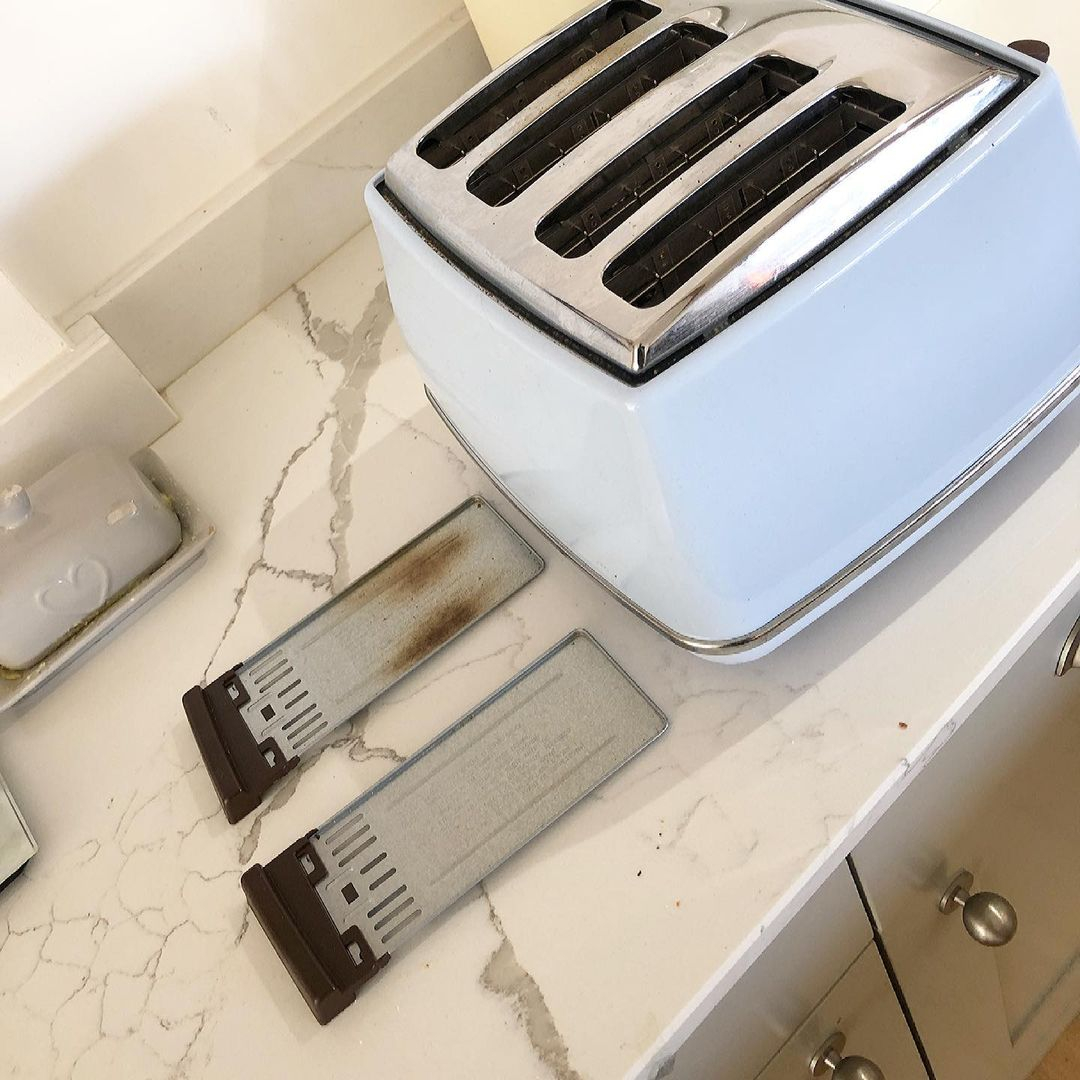
Wash the Crumb Tray
Once the crumb tray is empty, wash it thoroughly with warm, soapy water. Use a sponge or brush to scrub away any grease or residue. Rinse the tray under running water and allow it to air dry completely before reinserting it into the toaster.
It will be really easy. You just have to bring it to your sink and wash it as if your cutlery. But still, it will be better if you use the warm water. Crumb Tray Washing from @clean_queen.x
After the tray is clean, you can install it again. However, make sure that everything there is dry so that it won’t damage your toaster. Cleaning and Installing the Crumb Tray from @hlg_cleaning
Clean the Exterior
With a damp cloth, wipe down the exterior of the toaster, including the knobs, buttons, and surfaces. For stubborn stains or grease buildup, a mild kitchen cleaner can be used, but be cautious not to let any liquid seep into the toaster slots.
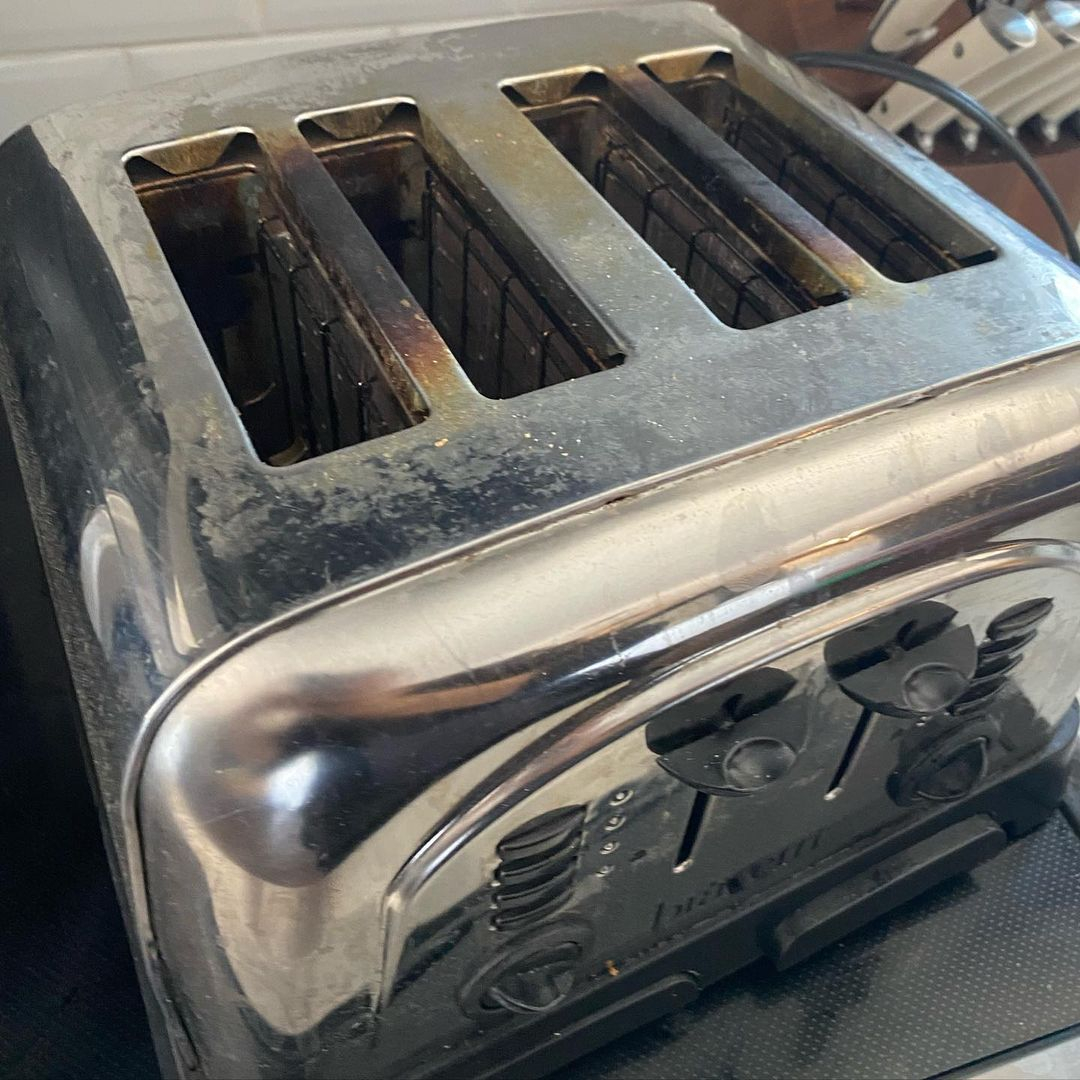
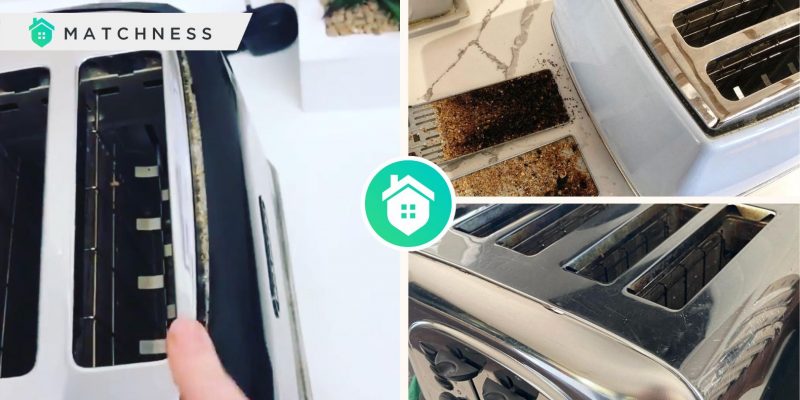
Can you see the burnt spot in this toaster? This one is the first thing that you should take care of. It can be really annoying and look dirty. Burnt Toaster Exterior from @riverrosecleaningservice

Look at how it can be shining again after being cleaned. After the burnt part, you can wipe and clean the front part of the toaster, the back part, and even the bottom part of the toaster. Total Exterior Cleaning from @riverrosecleaningservice
Deeper Cleaning
For a more thorough cleaning, you can use a toothbrush or cotton swab dipped in vinegar to scrub the interior of the toaster slots. Vinegar’s acidic properties help dissolve stubborn residue and remove lingering odors. After cleaning, wipe away any vinegar residue with a damp cloth and allow the toaster to dry completely before use.
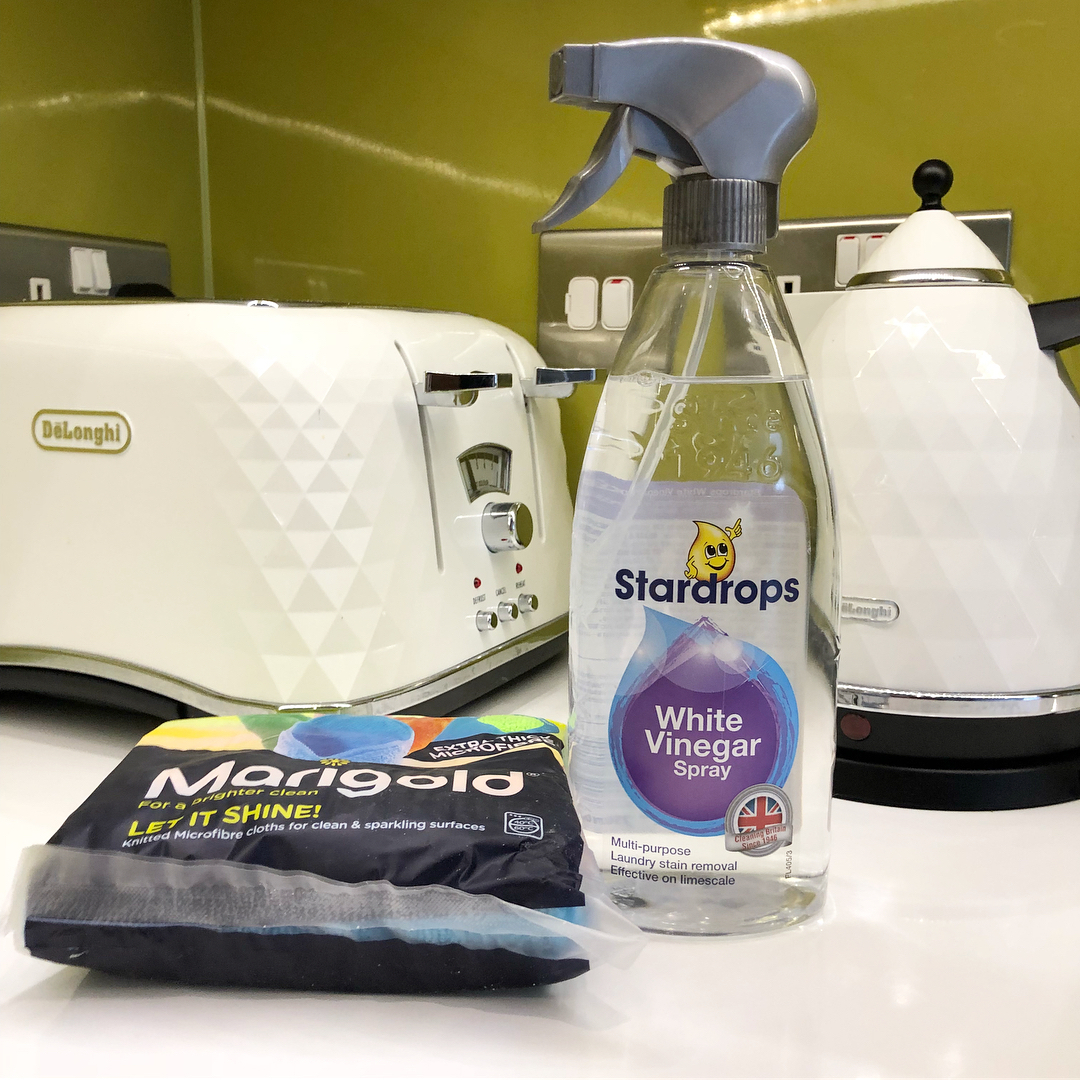
The simple one that you can use is the vinegar. Then, you can use a sponge or brush just based on the area that needs to be cleaned. You may also use cotton bud for the smaller parts. Deep Cleaning Tool from @keen4clean
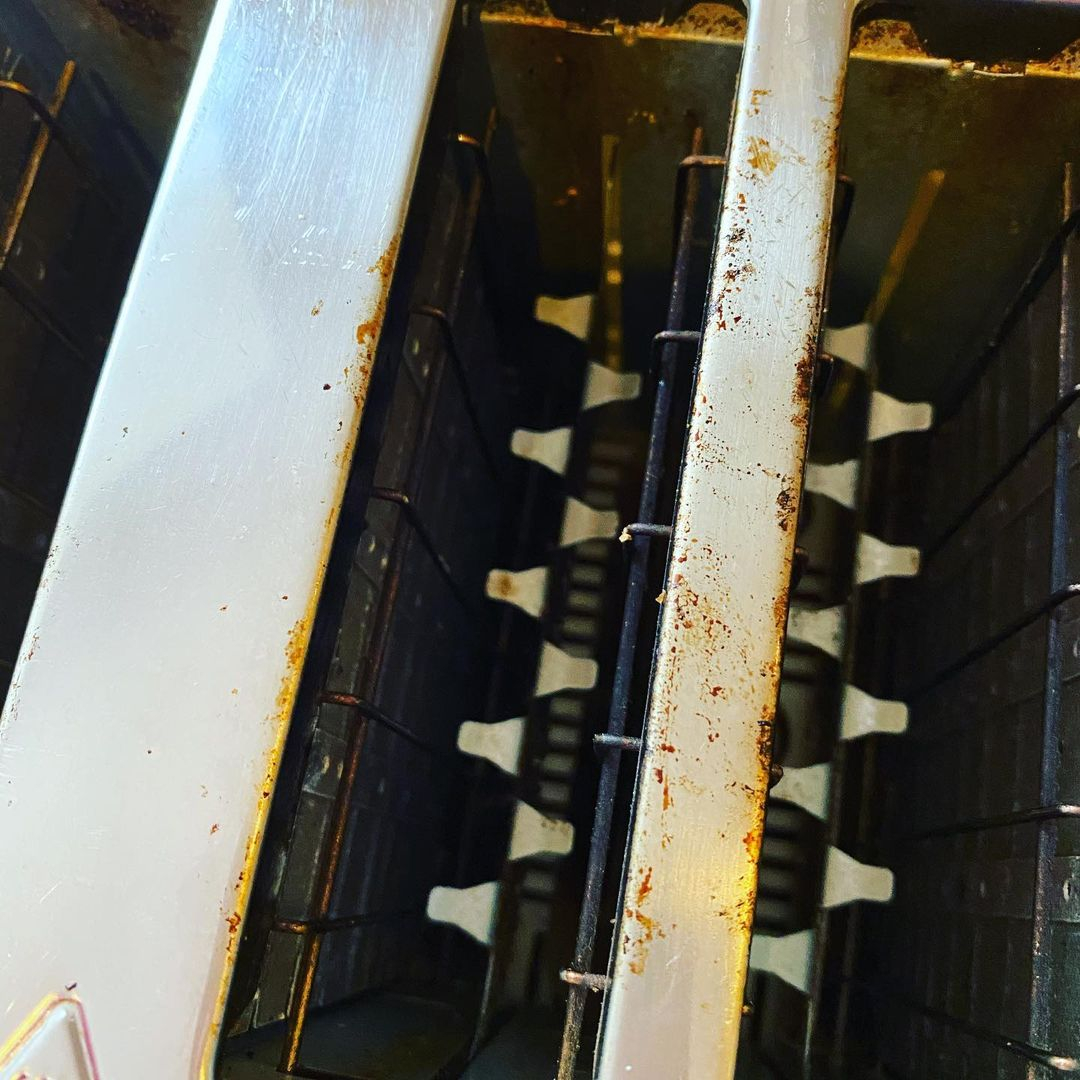
Can you see the burnt spot inside the toaster? That one should be cleaned too or that will be crusty. You can use a toothbrush or cotton bud. Inside the Toaster Cleaning from @frillsandfrothathome
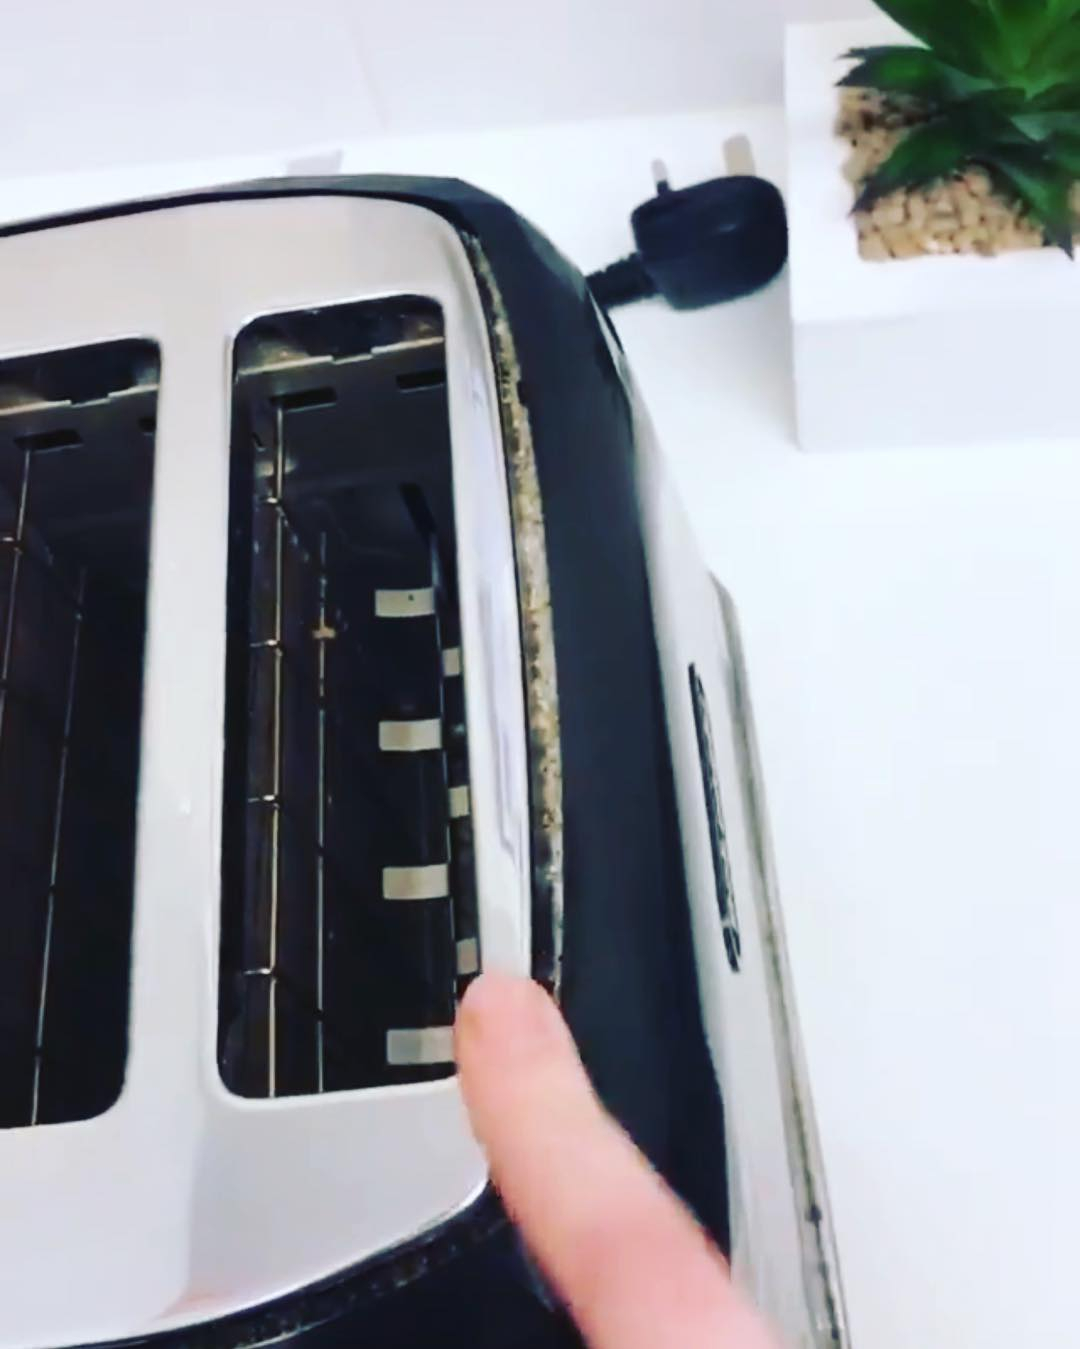
Look at that spot! There is a gap that lets the crump enter the space. That can be bad if you don’t clean it which can cause a health issue. Border Crump Cleaning from @thedailychum
Final Touches
Once the toaster is clean and dry, plug it back into the power source and perform a test run without any bread inside. This ensures that the appliance is functioning properly and eliminates any lingering odors from the cleaning process.
Finally, a clean toaster not only enhances the appearance of your kitchen but also ensures safe and efficient operation. By following the steps outlined in this guide and incorporating regular maintenance into your routine, you can keep your toaster in pristine condition for years to come. Say goodbye to burnt crumbs and stale odors, and hello to perfectly toasted slices every time you use your toaster!